> ## Documentation Index
> Fetch the complete documentation index at: https://docs.piebald.ai/llms.txt
> Use this file to discover all available pages before exploring further.
> Use Figma's remote MCP server in Piebald.
# Figma
Requires Piebald v0.3.0 or later. We don't yet support images being returned
from MCP tools, so tools like `get_screenshot` won't be useful yet (planned
for v0.4.0).
This is a workaround while we wait for Figma to officially approve Piebald for
use with their MCP server.
To use Figma's [official MCP server](https://help.figma.com/hc/en-us/articles/32132100833559-Guide-to-the-Figma-MCP-server) inside Piebald, you'll need to create a Figma app and enable the `mcp:connect` OAuth scope. Unfortunately, Figma's developer UI doesn't display that scope, so you'll need to use a workaround and add it manually by **replaying the app update request from your browser's DevTools**.
Make sure to save the Client Secret when Figma shows it; it's necessary for Figma MCP
server OAuth and is only shown once.
1. Go to [https://www.figma.com/developers/apps](https://www.figma.com/developers/apps).
2. Click **Create a new app**.
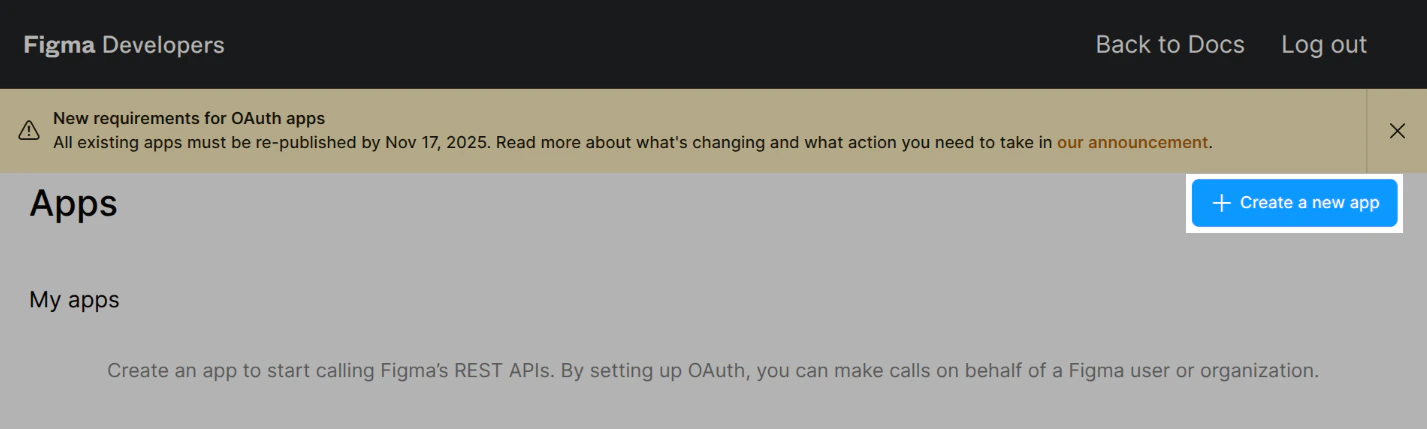 3. Enter a name for the app.
4. Select an owner.
5. Click **Create app**.
6. Copy the Client ID, and save the Client Secret.
3. Enter a name for the app.
4. Select an owner.
5. Click **Create app**.
6. Copy the Client ID, and save the Client Secret.
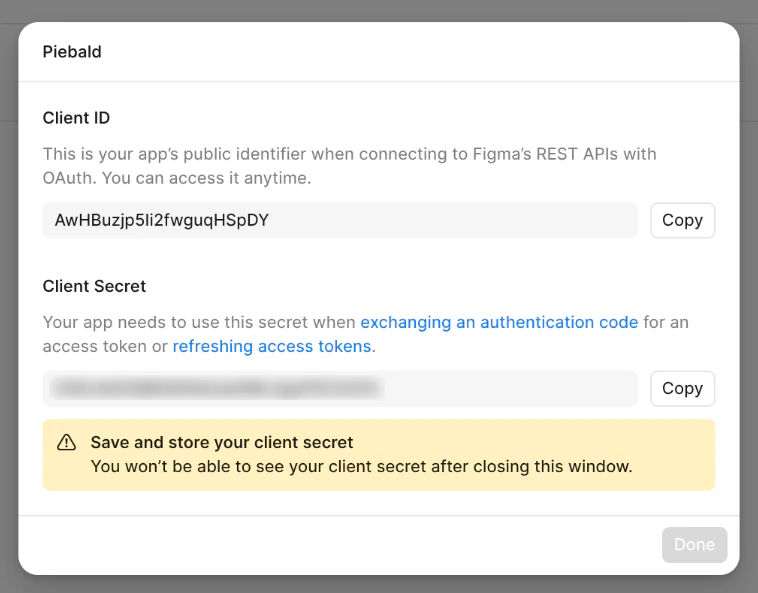 7. Click **Done**.
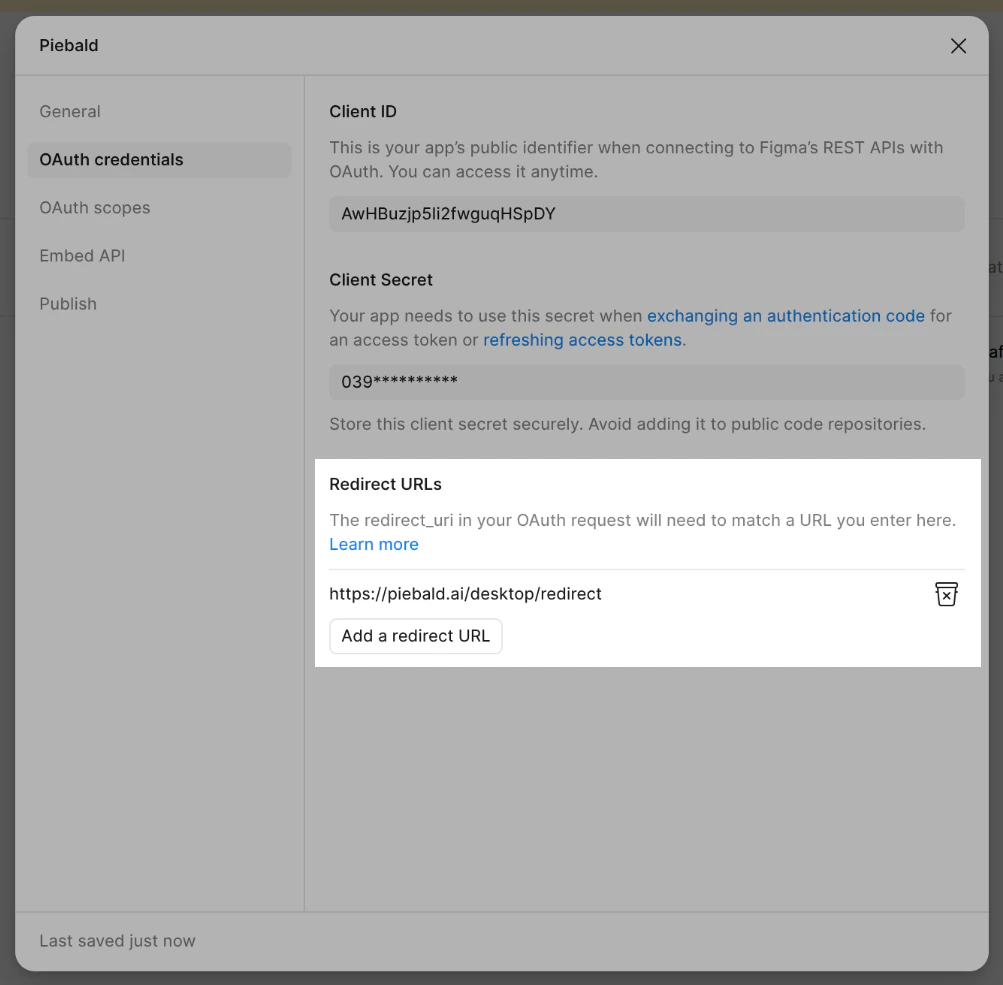
8. In the configuration dialog that should automatically open, go to **OAuth credentials** in the left-hand sidebar.
9. Under **Redirect URLs**, click **Add a redirect URL**.
10. Enter `https://piebald.ai/desktop/redirect` and click **Add**.
7. Click **Done**.
8. In the configuration dialog that should automatically open, go to **OAuth credentials** in the left-hand sidebar.
9. Under **Redirect URLs**, click **Add a redirect URL**.
10. Enter `https://piebald.ai/desktop/redirect` and click **Add**.
 11. Go to **OAuth scopes** in the left-hand sidebar.
12. Open your browser's DevTools, and go to the **Network** tab.
13. Enable any random scope, such as **Users** → `current_user:read`.
11. Go to **OAuth scopes** in the left-hand sidebar.
12. Open your browser's DevTools, and go to the **Network** tab.
13. Enable any random scope, such as **Users** → `current_user:read`.
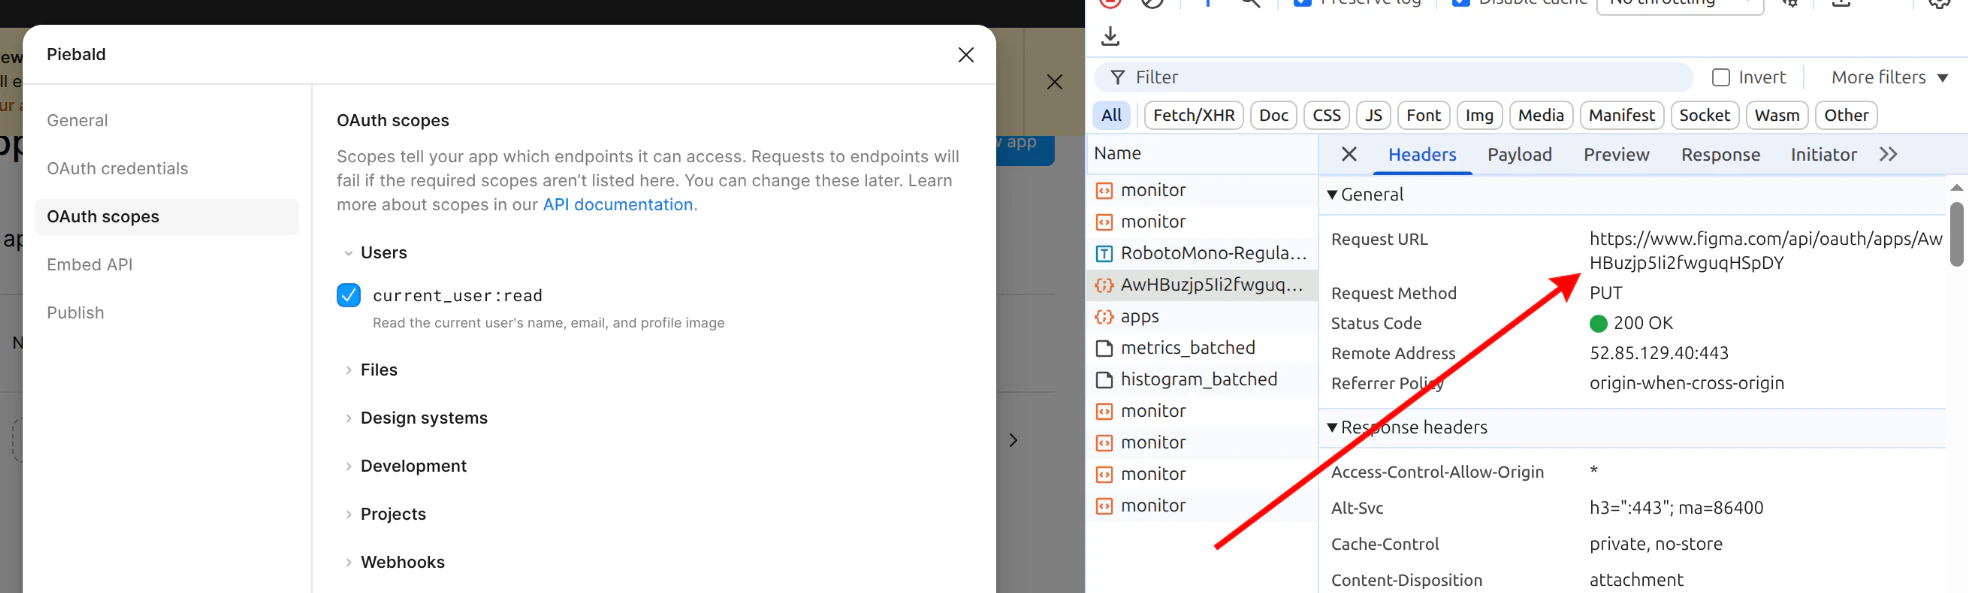 14. In the Network tab, find the update request. The URL should look like `https://www.figma.com/api/oauth/apps/`.
15. Copy the request as cURL.
You don't need to use `curl`. You can send the request with any HTTP
client, which is especially more convenient on Windows. Whatever client
you use, make sure to include all of the headers from the copied request.
16. Change the scope in the request body to `mcp:connect`.
17. Send the request. For cURL, execute the modified command.
14. In the Network tab, find the update request. The URL should look like `https://www.figma.com/api/oauth/apps/`.
15. Copy the request as cURL.
You don't need to use `curl`. You can send the request with any HTTP
client, which is especially more convenient on Windows. Whatever client
you use, make sure to include all of the headers from the copied request.
16. Change the scope in the request body to `mcp:connect`.
17. Send the request. For cURL, execute the modified command.
 Some values in the cURL command were truncated for brevity in the
screenshot above; the actual command will be much larger.
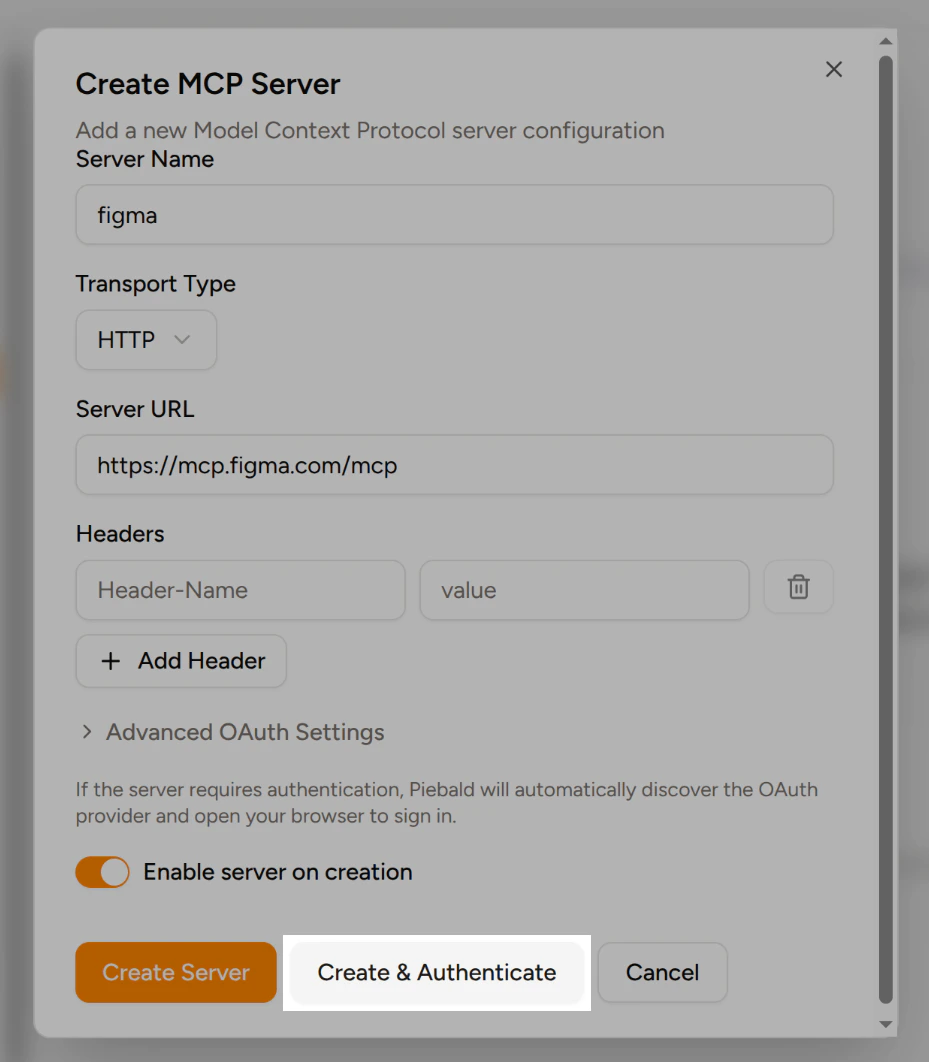
18. In Piebald, go to **Settings → MCP Servers** and click **Add → Add Server**.
19. Enter a name for the MCP server, such as `figma`.
20. For **Transport Type**, select **HTTP**.
21. Enter `https://mcp.figma.com/mcp` as the Server URL.
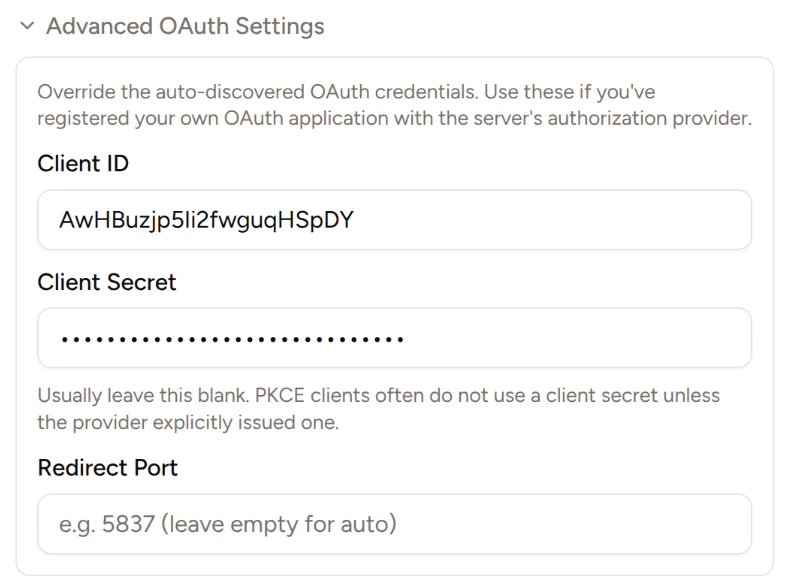
22. Expand **Advanced OAuth Settings**, then paste the Client ID and Client Secret from your Figma app.
Some values in the cURL command were truncated for brevity in the
screenshot above; the actual command will be much larger.
18. In Piebald, go to **Settings → MCP Servers** and click **Add → Add Server**.
19. Enter a name for the MCP server, such as `figma`.
20. For **Transport Type**, select **HTTP**.
21. Enter `https://mcp.figma.com/mcp` as the Server URL.
22. Expand **Advanced OAuth Settings**, then paste the Client ID and Client Secret from your Figma app.
 23. Click **Create & Authenticate** at the bottom of the dialog.
 24. Complete the Figma authorization flow in your browser.
25. Return to Piebald, and check that the MCP server is green.
24. Complete the Figma authorization flow in your browser.
25. Return to Piebald, and check that the MCP server is green.
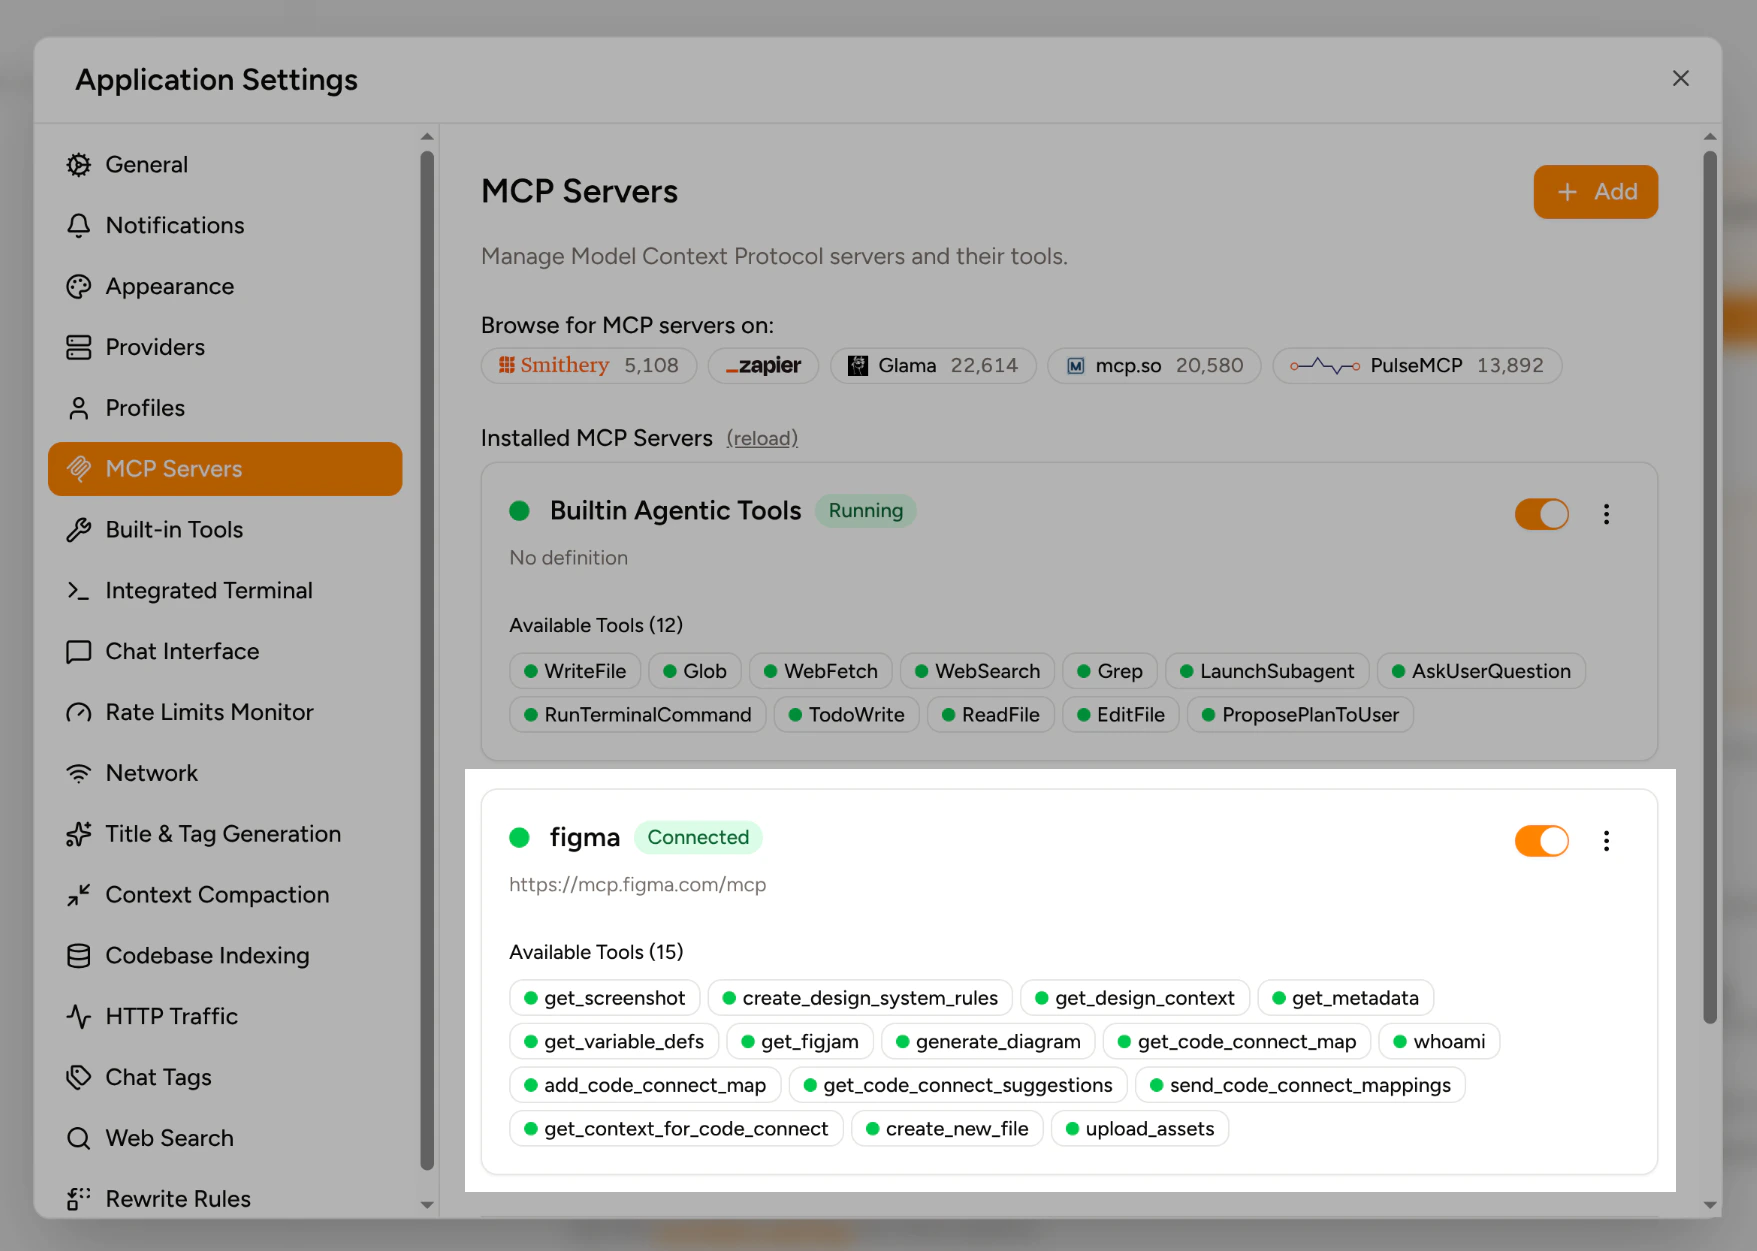 You should now be able to use the Figma MCP server!